
 Feature list
============
Feature list
============
| Feature | Standard point count | Adjusted point count |
|---|---|---|
| Depth of Field | 10 | 10 |
| Texture | 10 | 10 |
| Mesh design | 10 | 10 |
| Image Based Lighting | 30 | 25 |
| Homogenous Participating Media | 30 | 25 |
| Total | 90 | 80 |
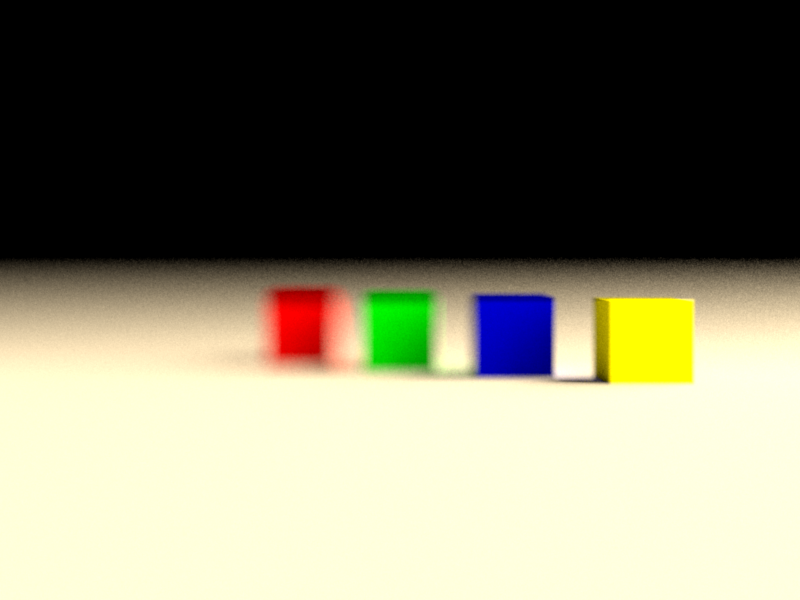
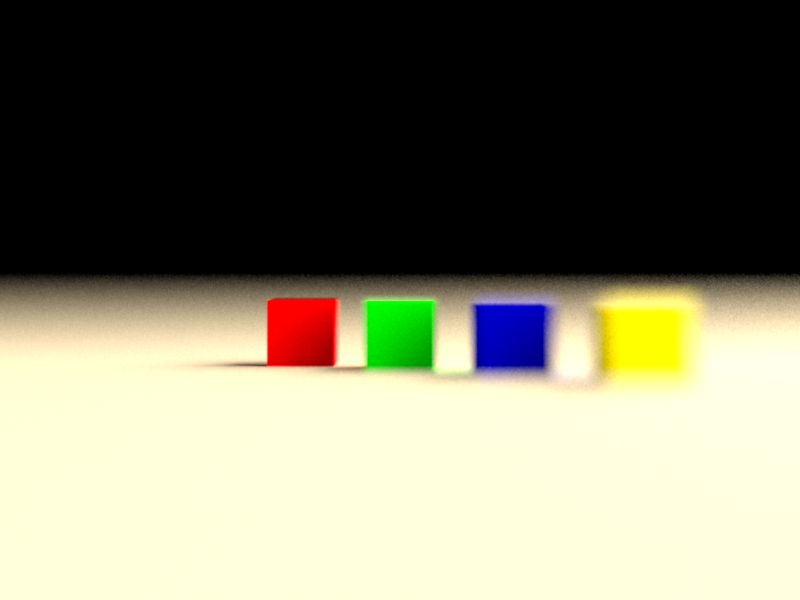
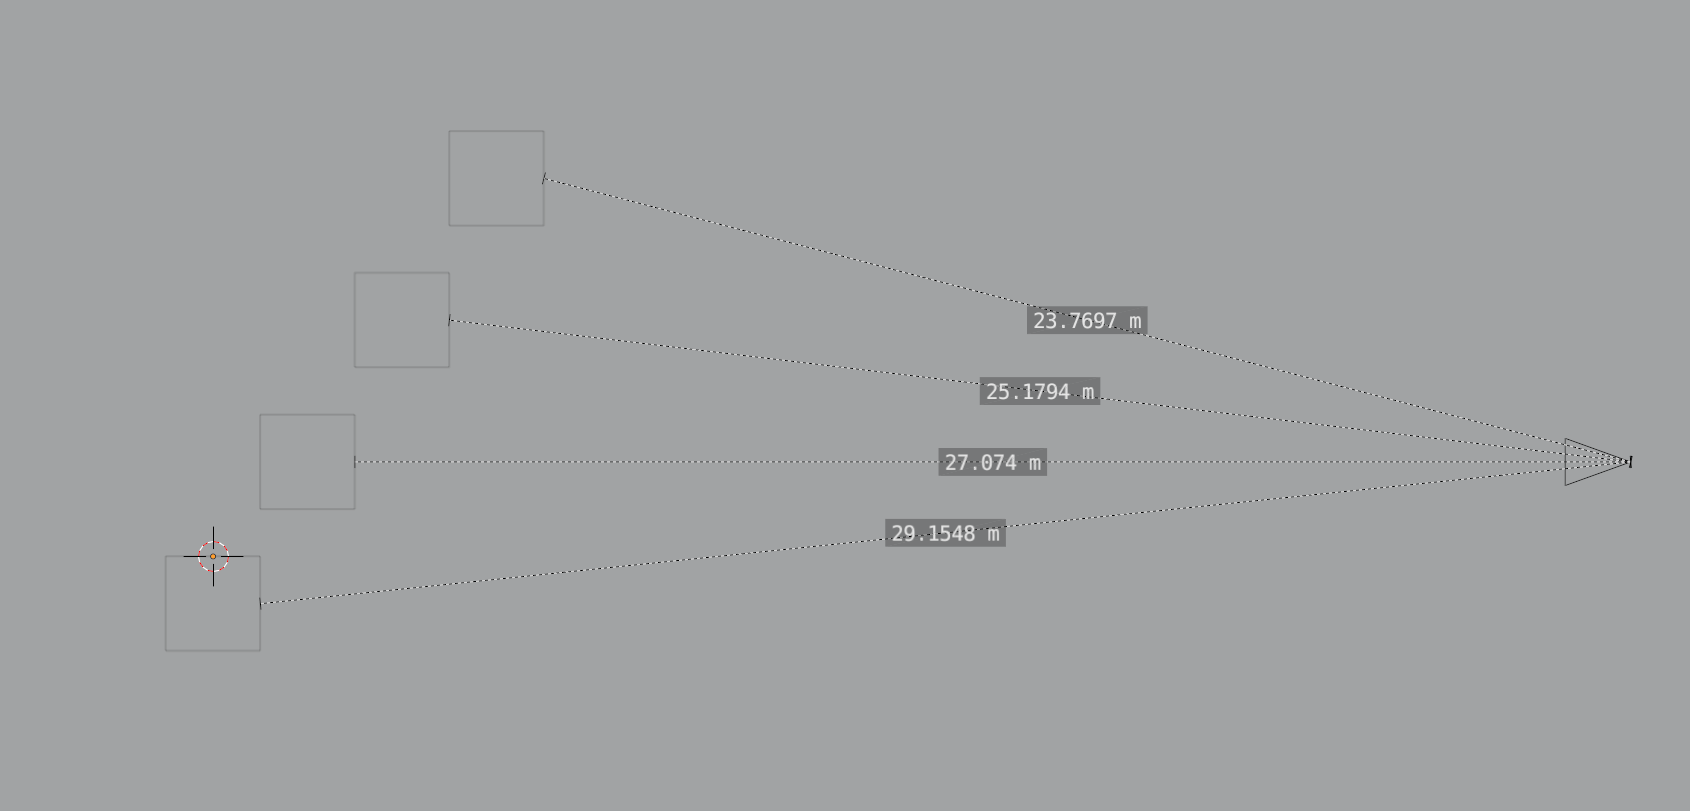 Here, I focus on the first and last cube from the right by setting the focal distance as measured with Blender. The aperture is set to 2.


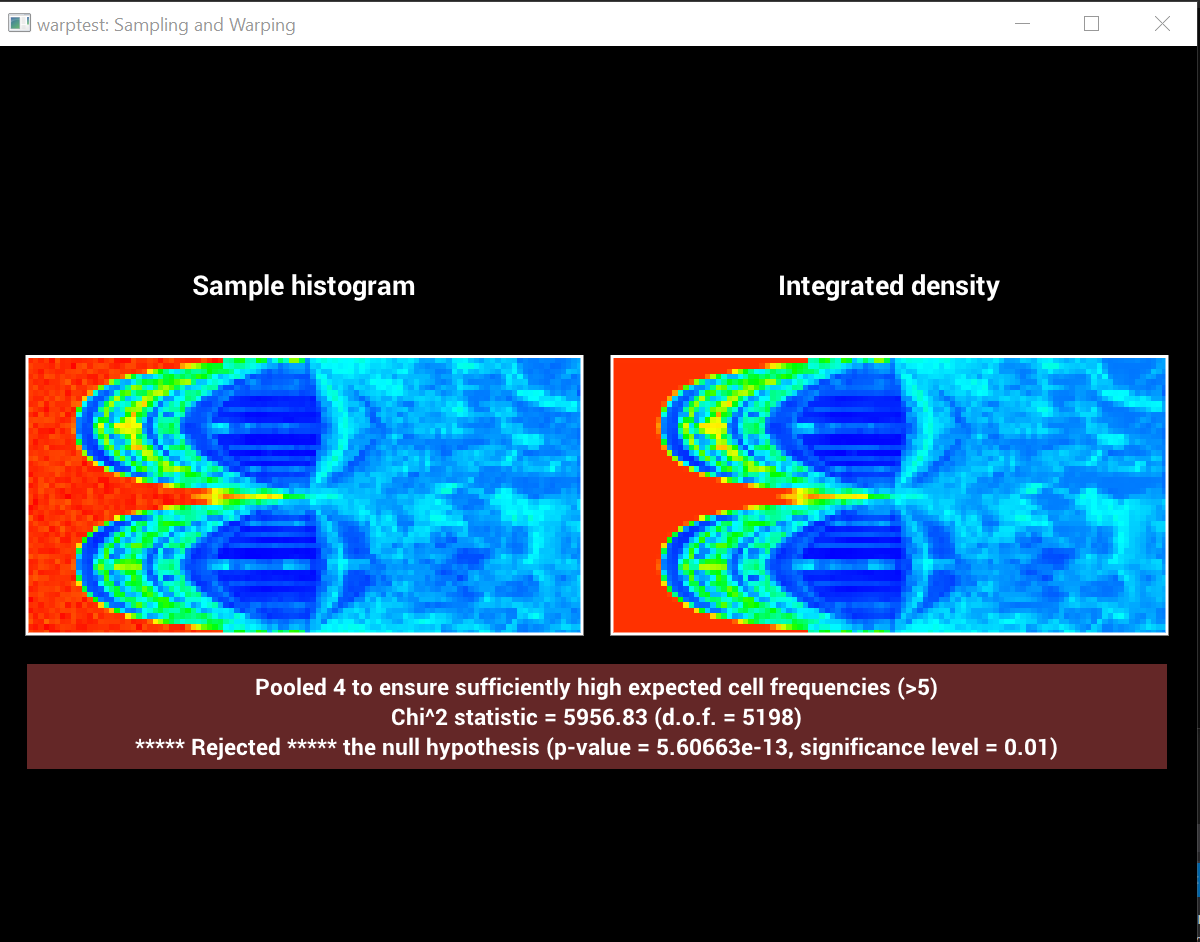
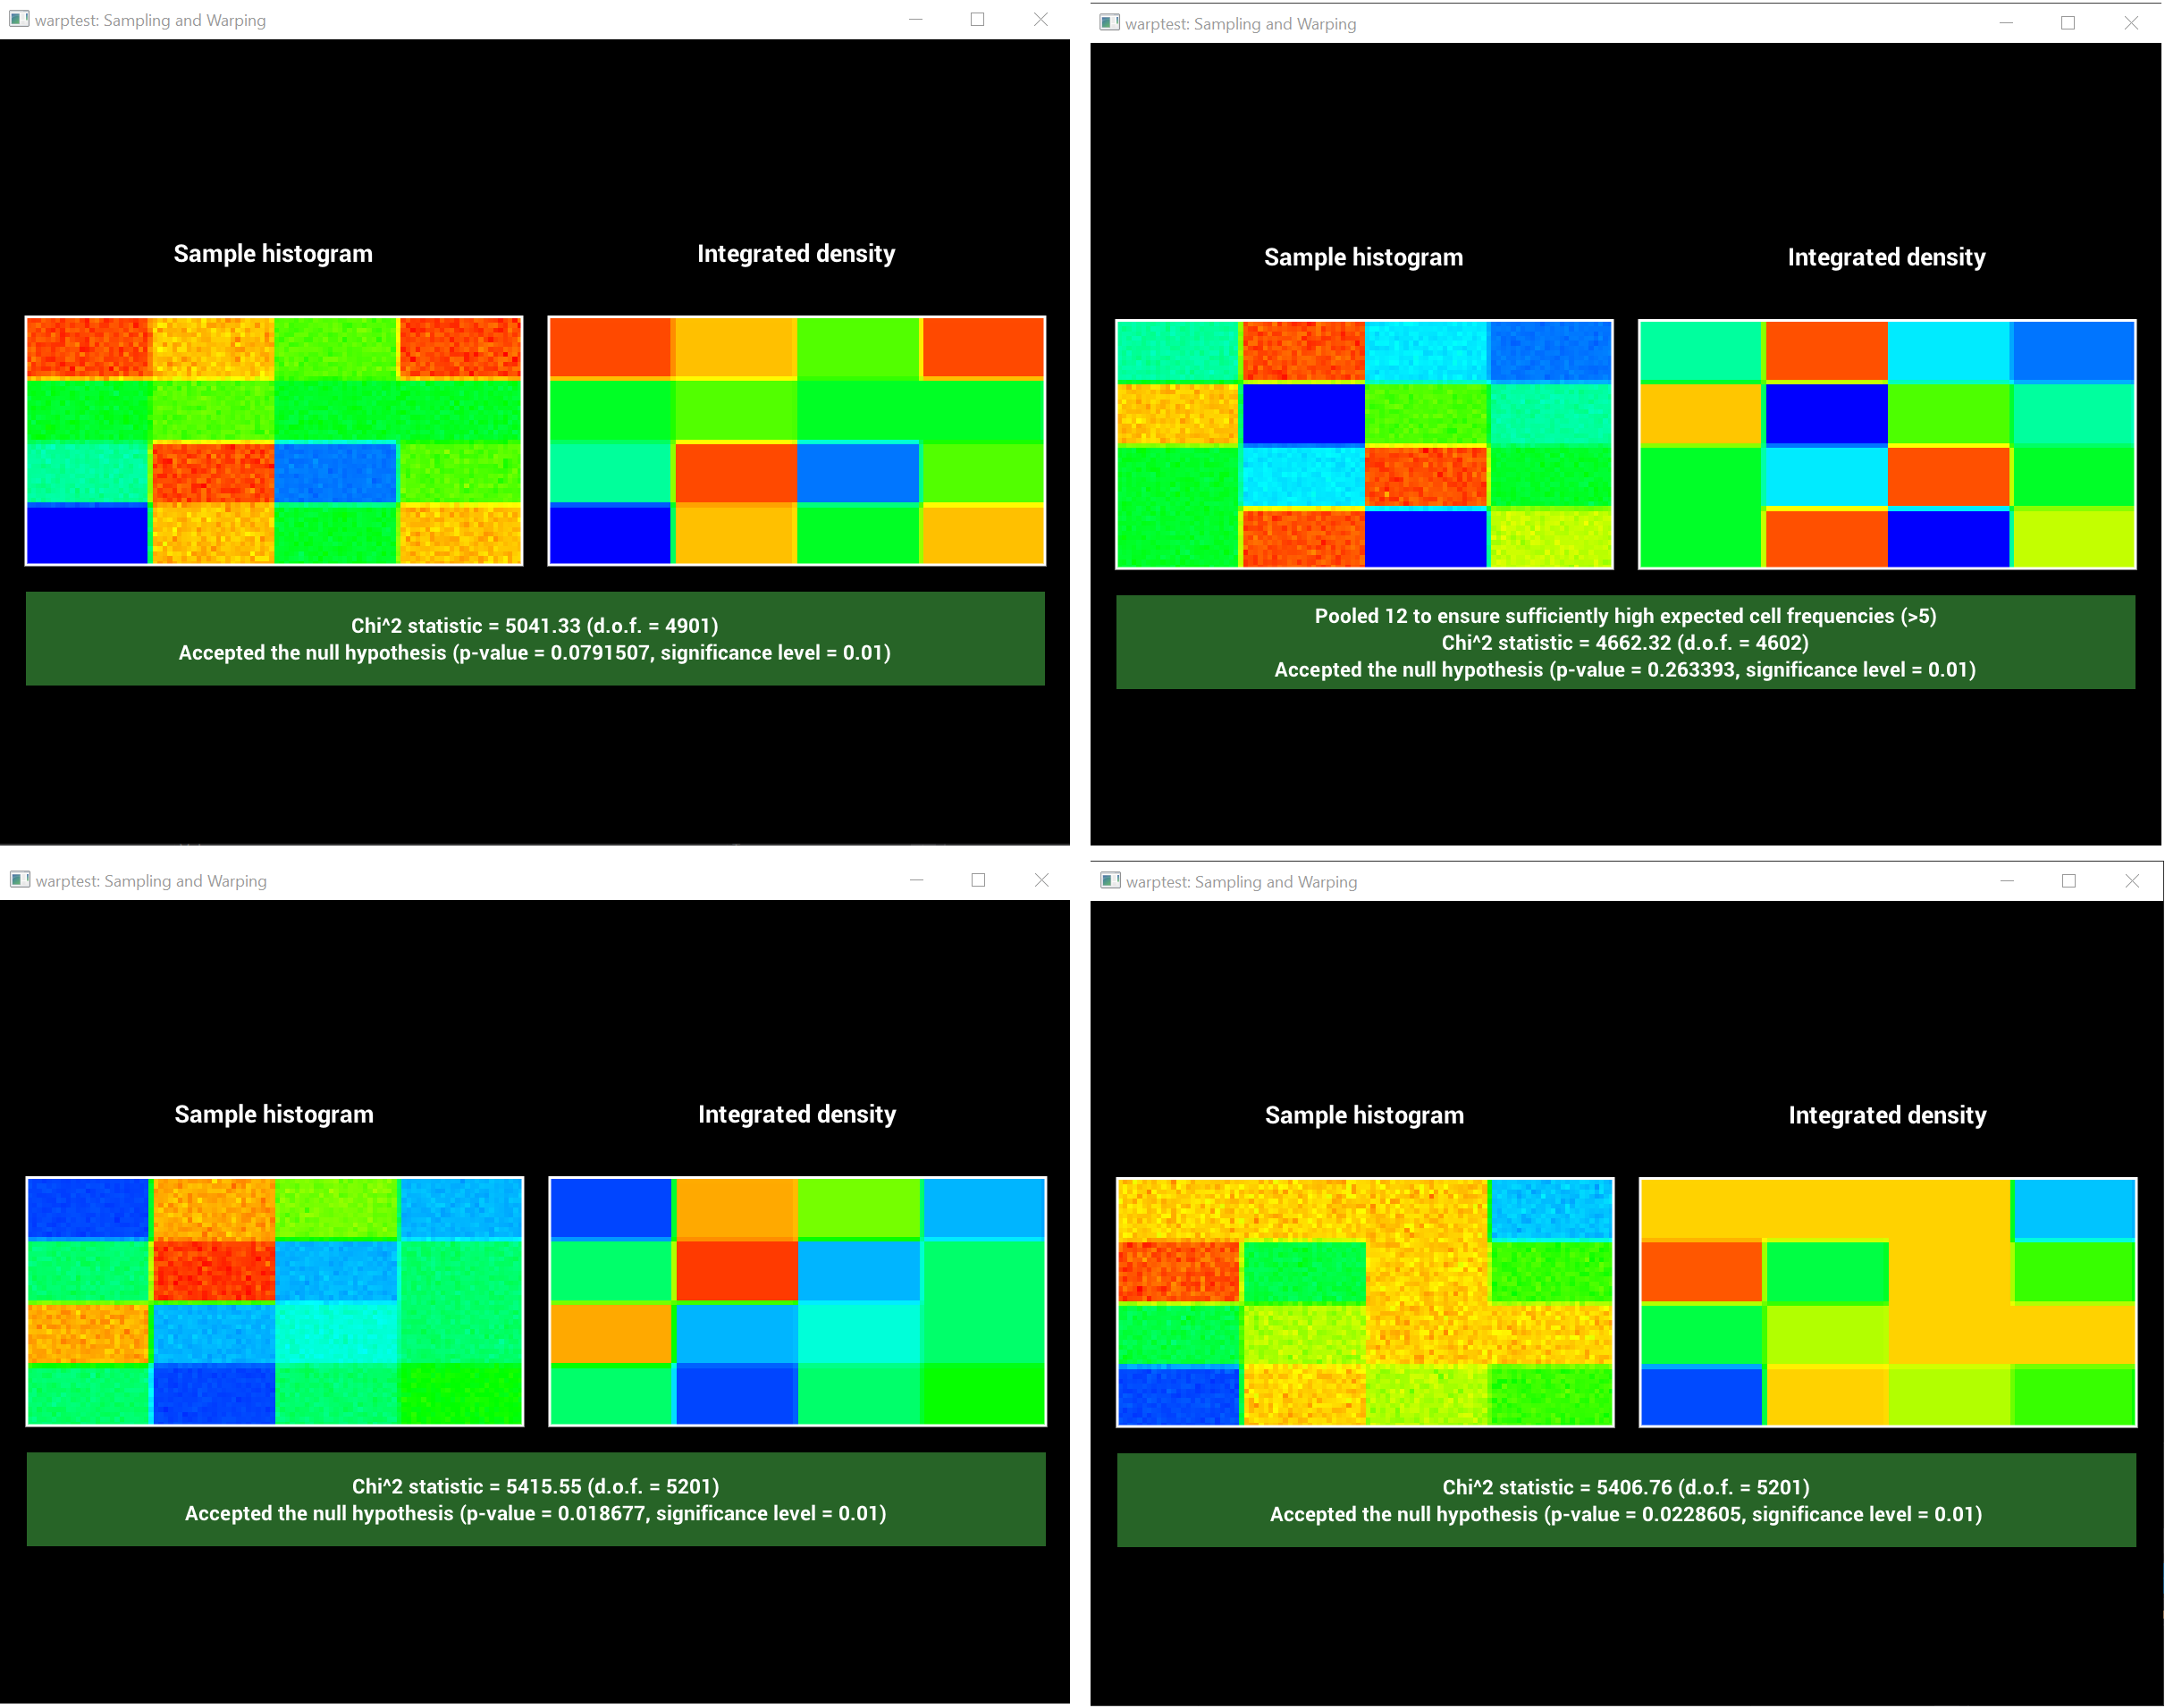 However, when using an actual light probe (here, uffizi-large, size: 1024x1024) the test fails, even though the expected probability densities and produced probability densities look quite similar.
Also, note that the image is rotated in warptest but that should not cause any issue in evaluating the densities.
However, when using an actual light probe (here, uffizi-large, size: 1024x1024) the test fails, even though the expected probability densities and produced probability densities look quite similar.
Also, note that the image is rotated in warptest but that should not cause any issue in evaluating the densities.
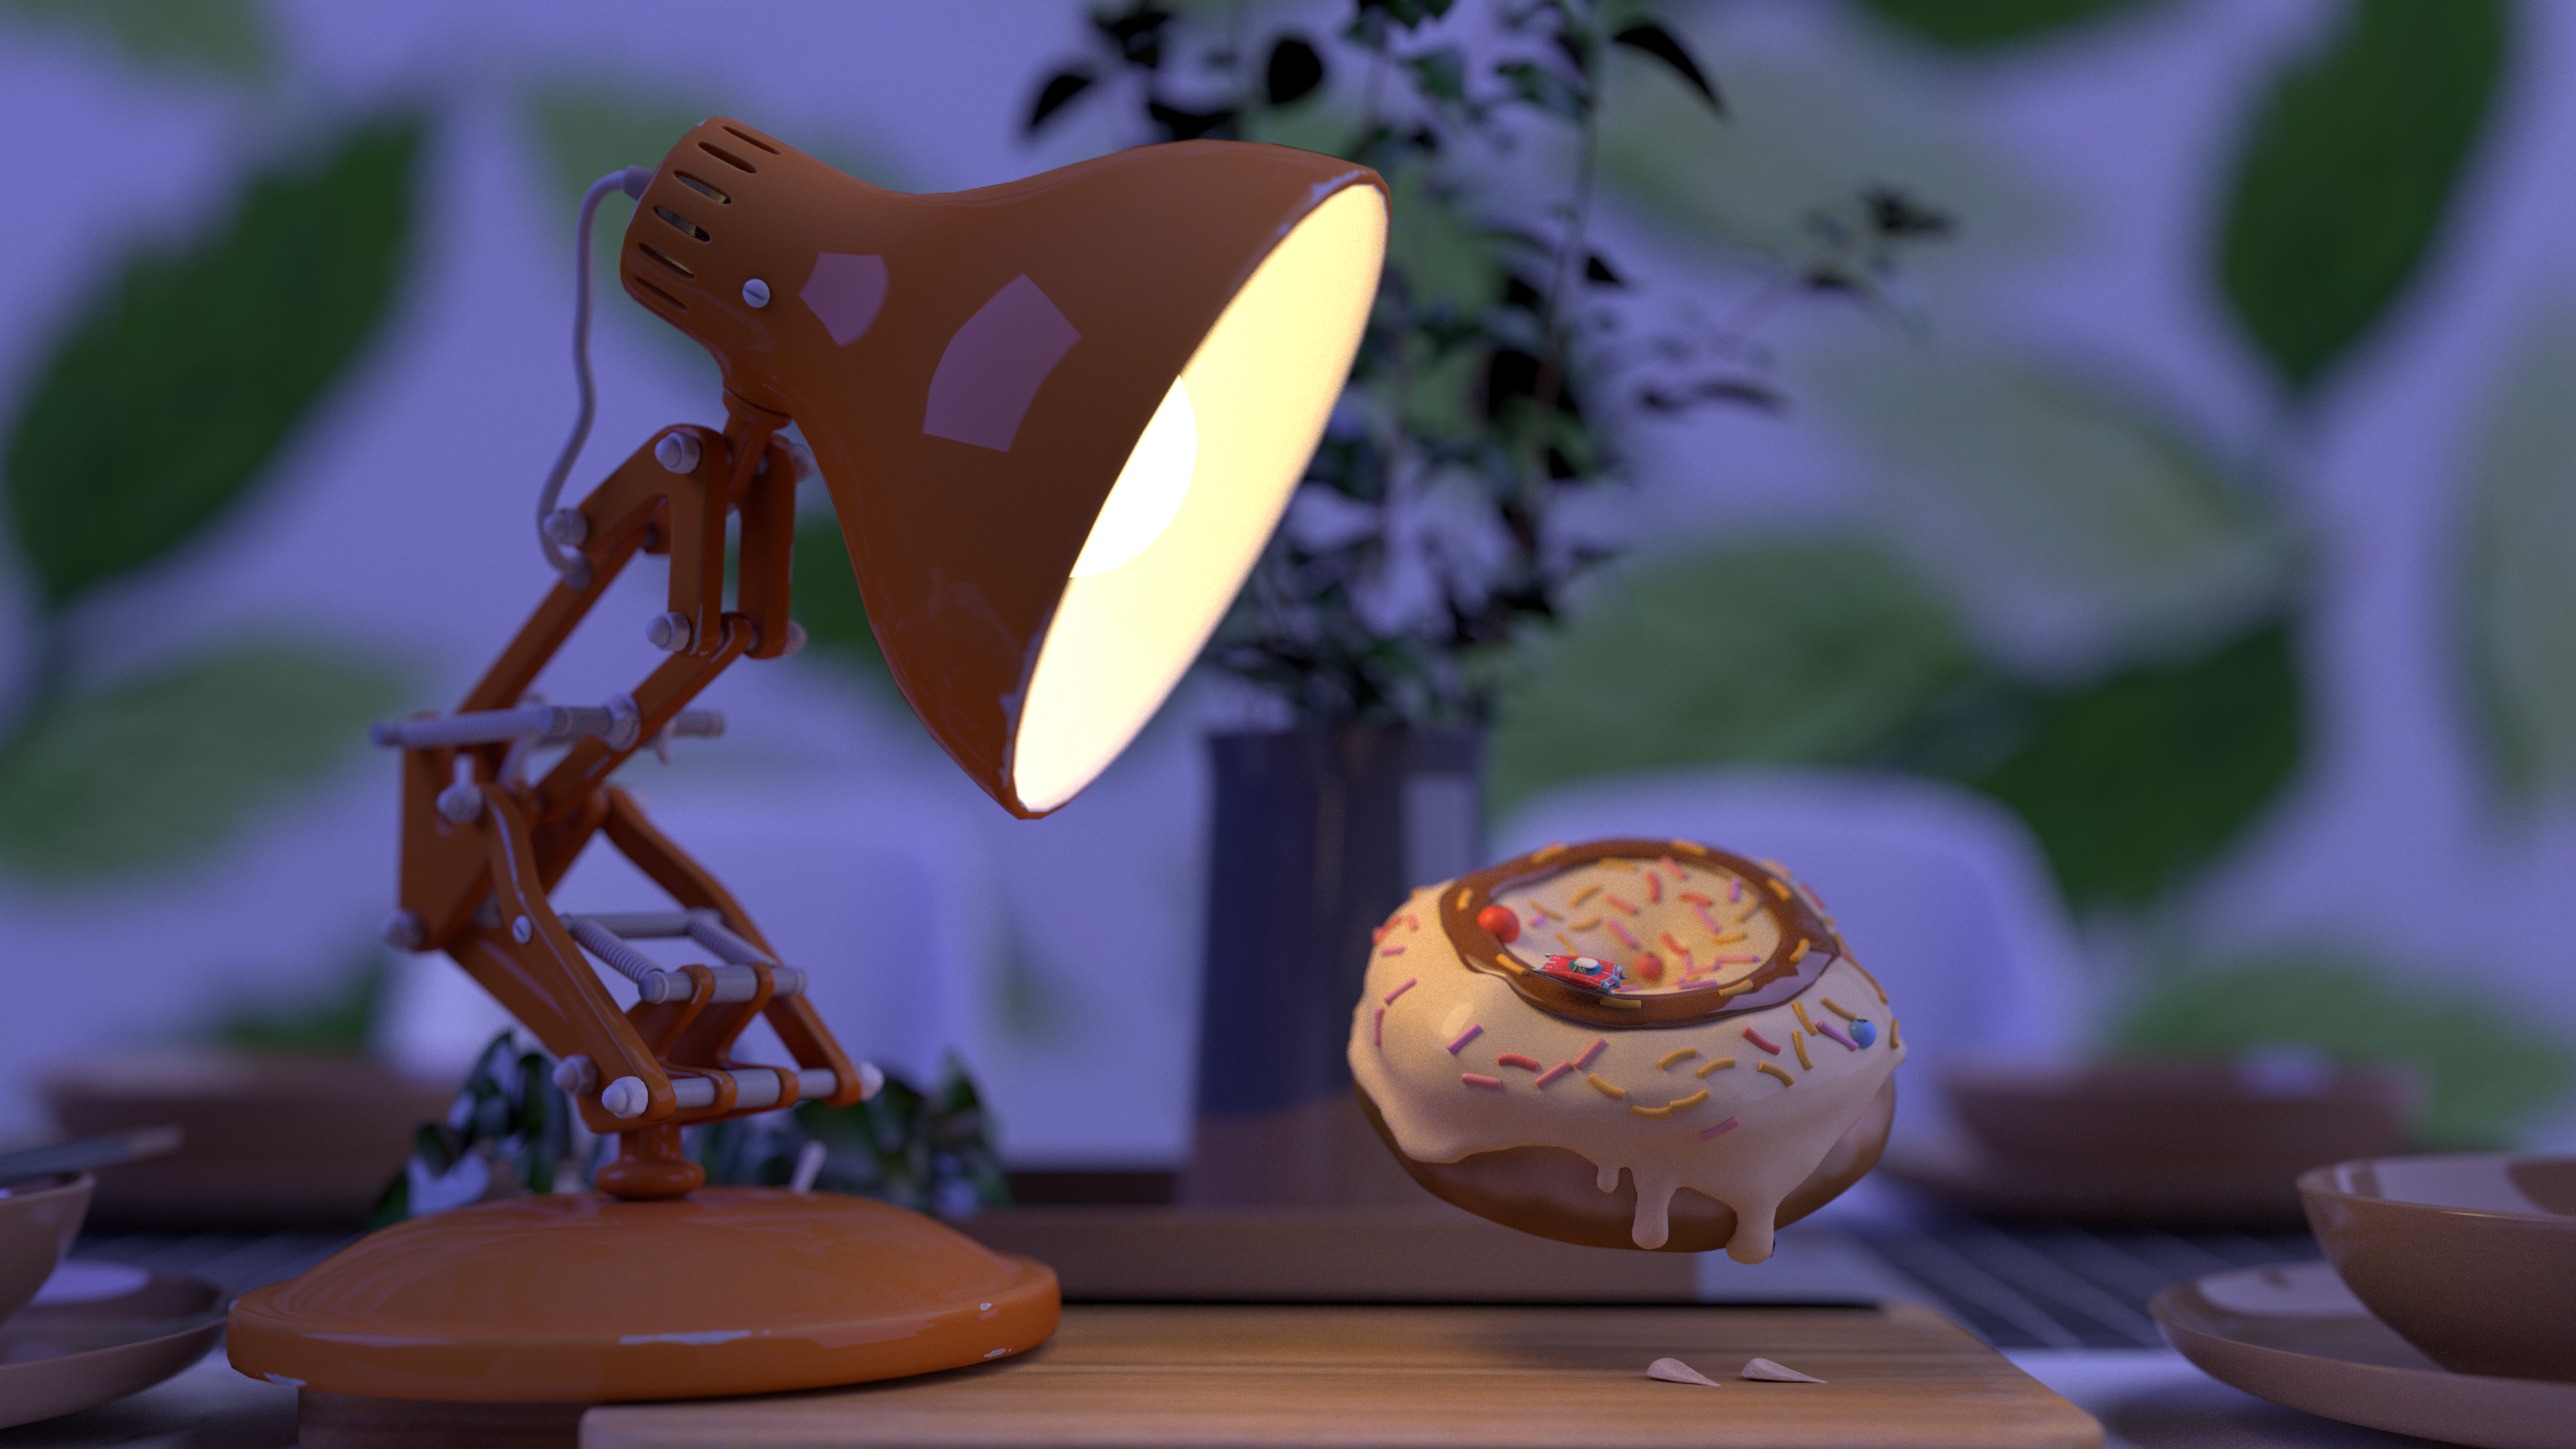
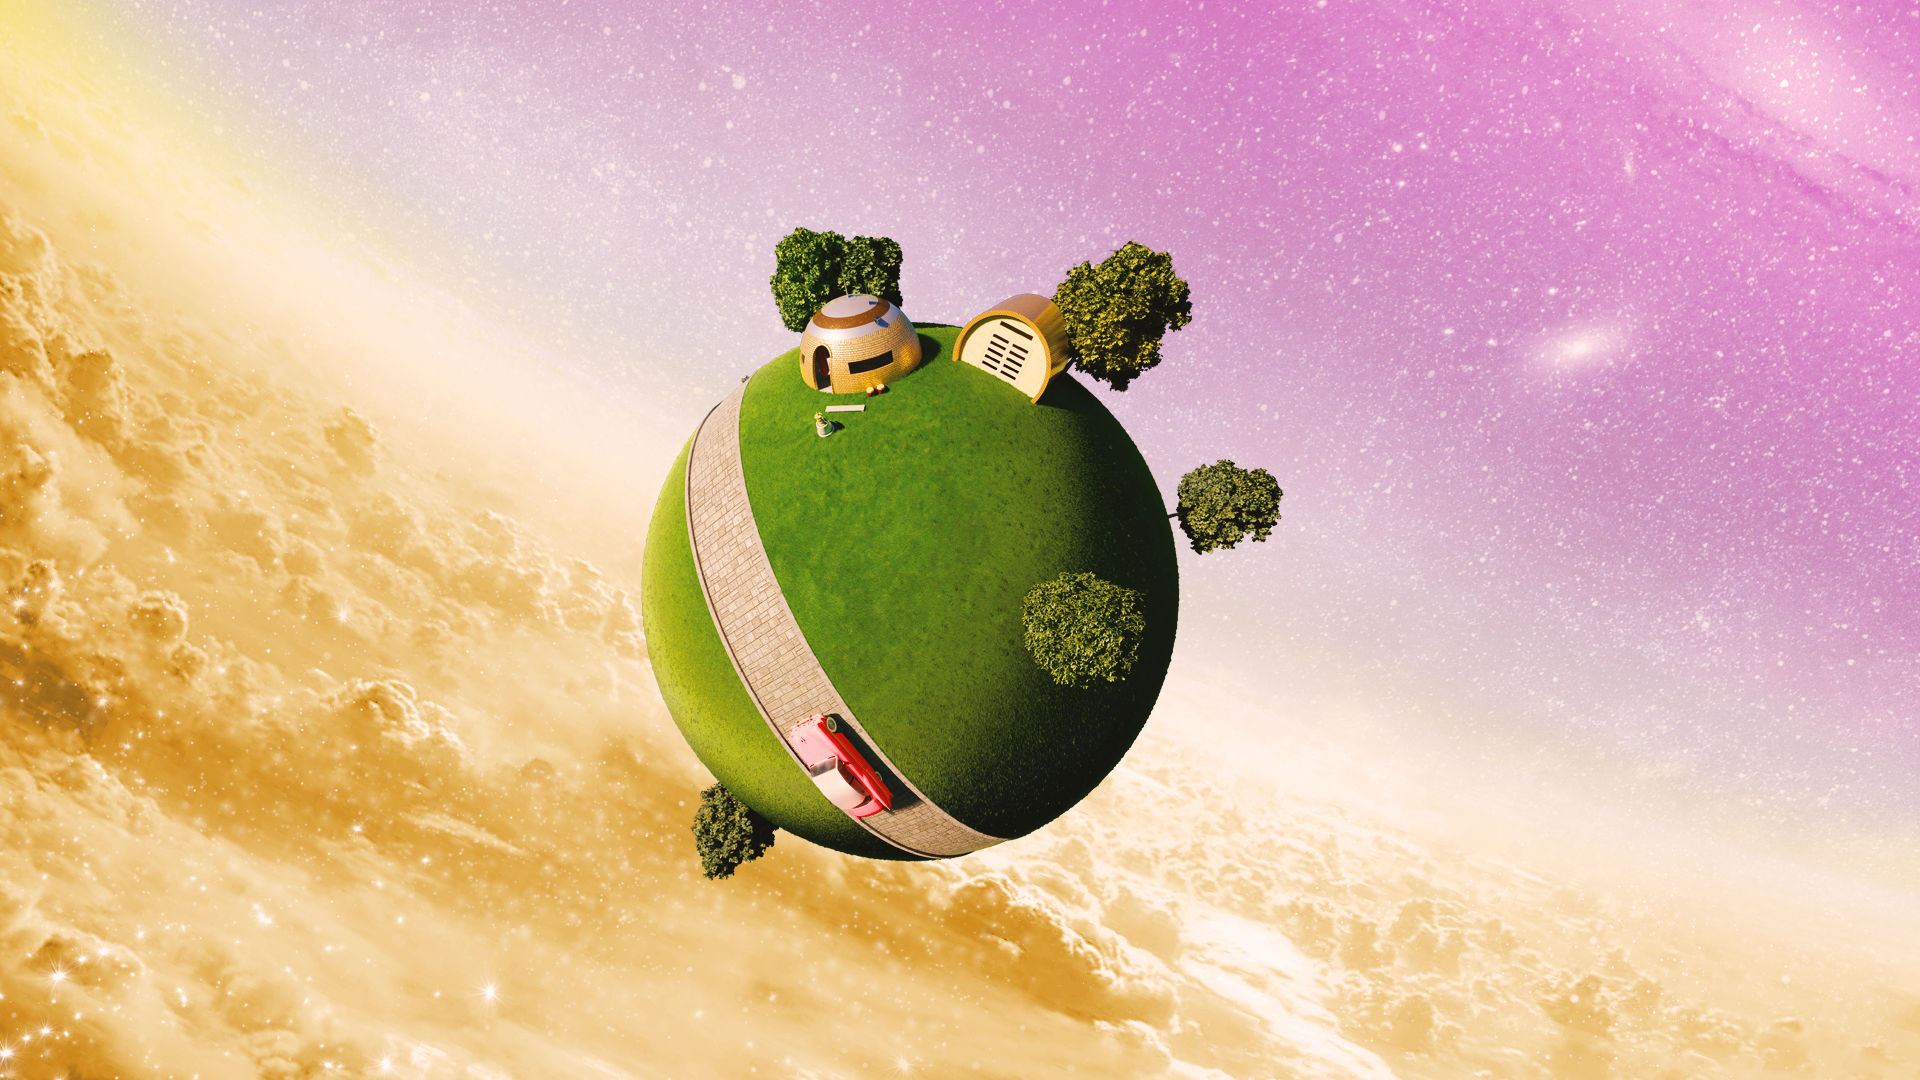
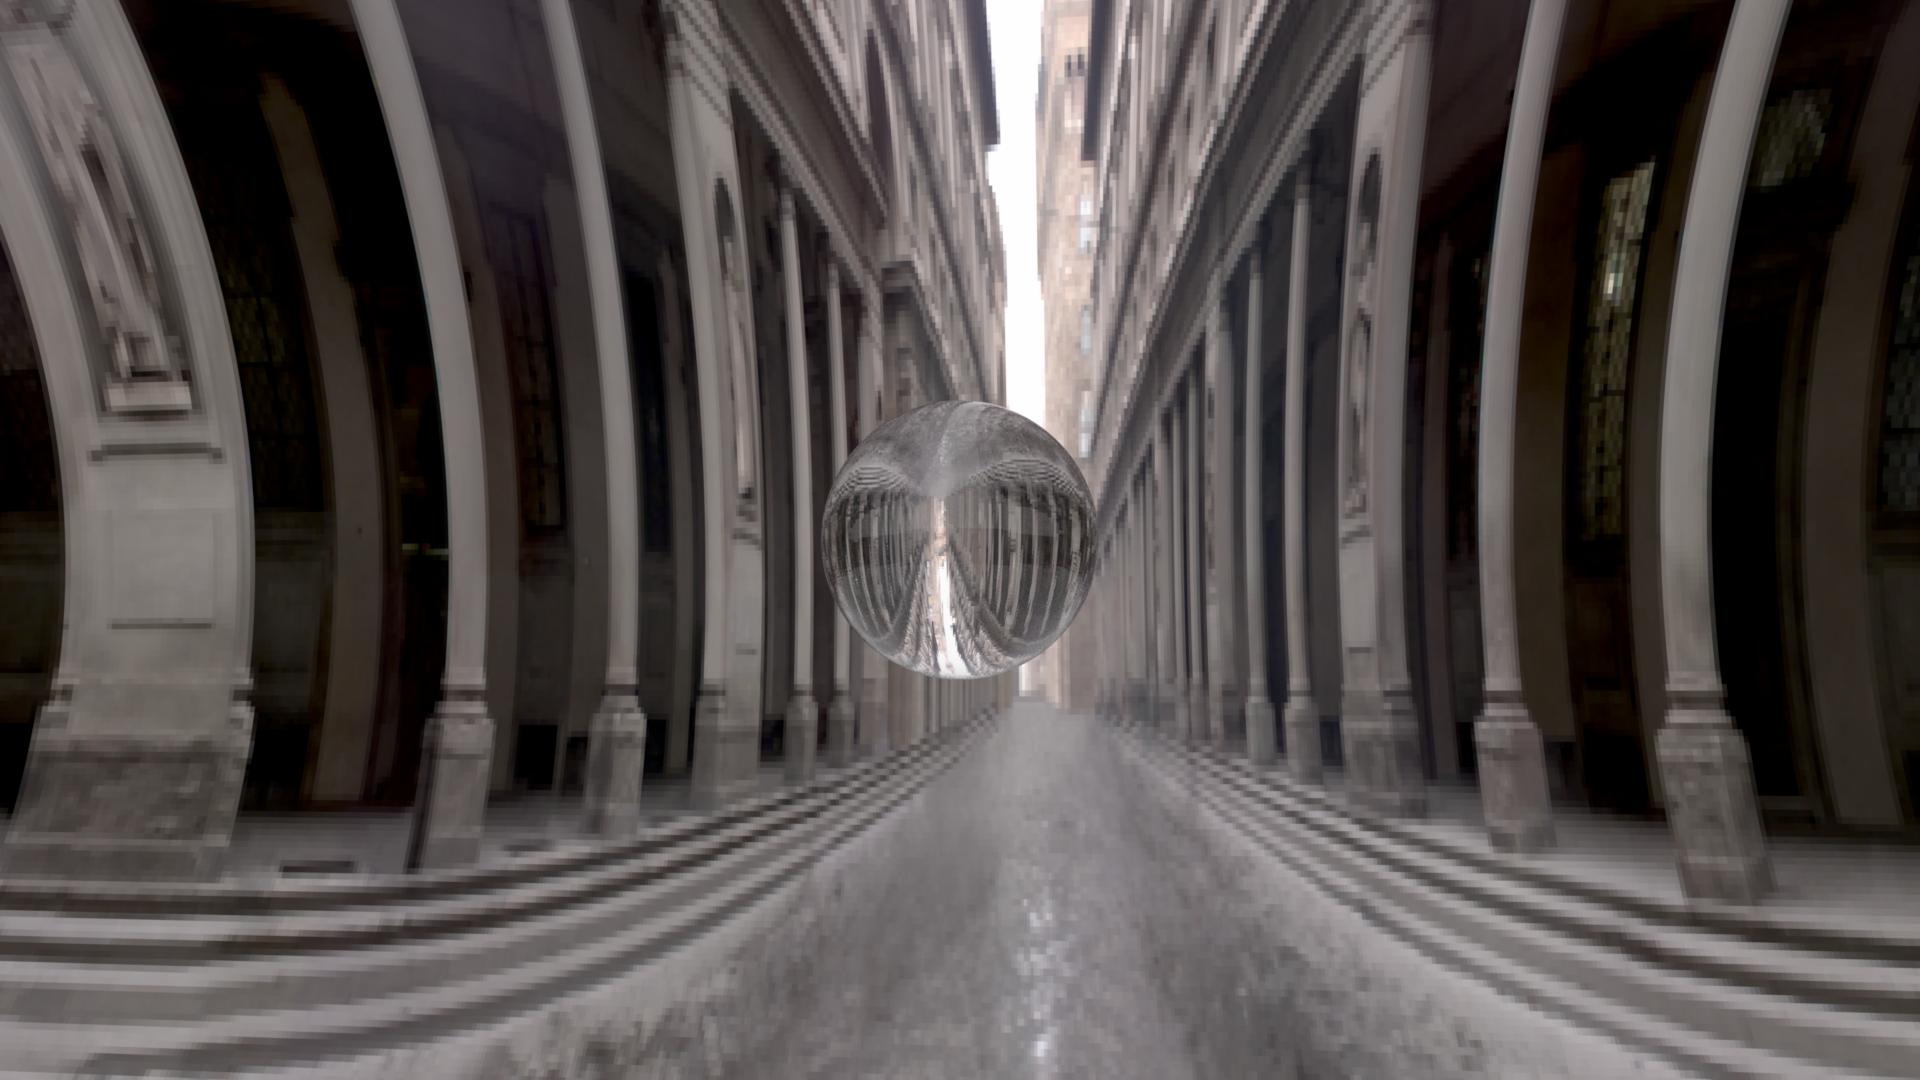
 The following is a scene focusing on a dielectric sphere with IBL using the volumetric integrator (without the thin fog medium) and using the Uffizi-large light probe. Also, the fov of the camera is set to 90 (hence, the curved pillars).
 Homogenous Participating Media (25 pts)
=========
Finally, I have also implemented Homogeneous Participating Media to simulate thin fog which is spread throughout the scene. I hoped this would convey a foggy night aesthetic to my scene. As for the volumetric integrator,
I closely followed PBRv3's implemetation of VolPathIntegrator, the code is present in src/volintegrator.cpp. For the phase function, I implemented Henyey-Greenstein phase function as mentioned in PBR.
The classes handling the medium, and medium interface are implemented in include/nori/medium.h and src/homogenous.cpp. The medium is parametrized with the absorption (sigma_a) and scattering factor (sigma_s) respectively. It is also parametrized by the asymmetry factor g, which is passed to the Henyey-Greenstein phase function.
My current implementation only handles a thin fog present in the entire scene. But I feel have implemented all the necessary components to extend it multiple media easily.
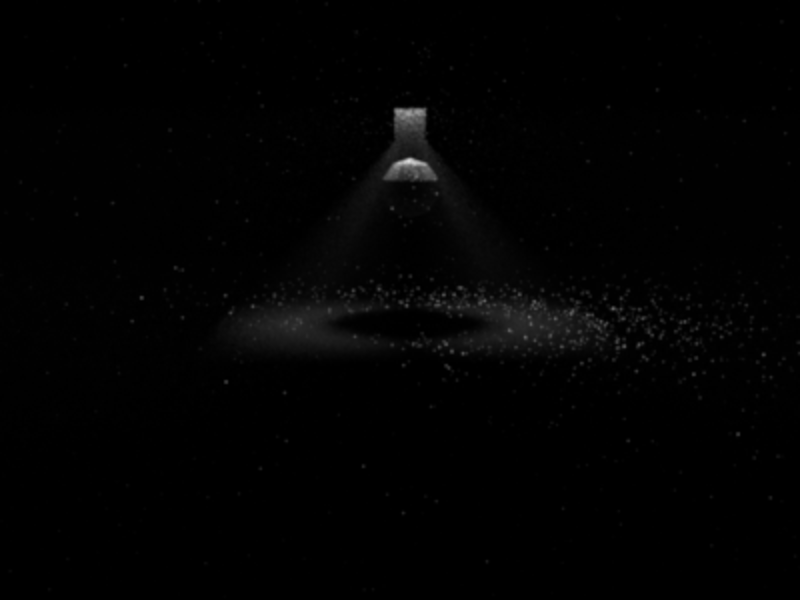
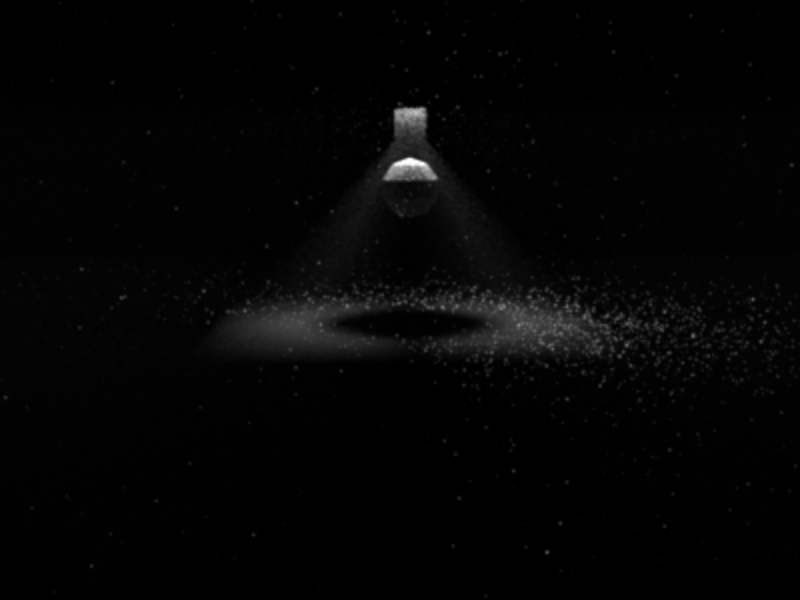
To validate my implementation I have set up a simple scene containing a low-poly sphere, and a light source on top of it.
For the base case, sigma_a = sigma_s = 0.01 and g = 0 (isotropic medium). All the images are rendered at 400x300.
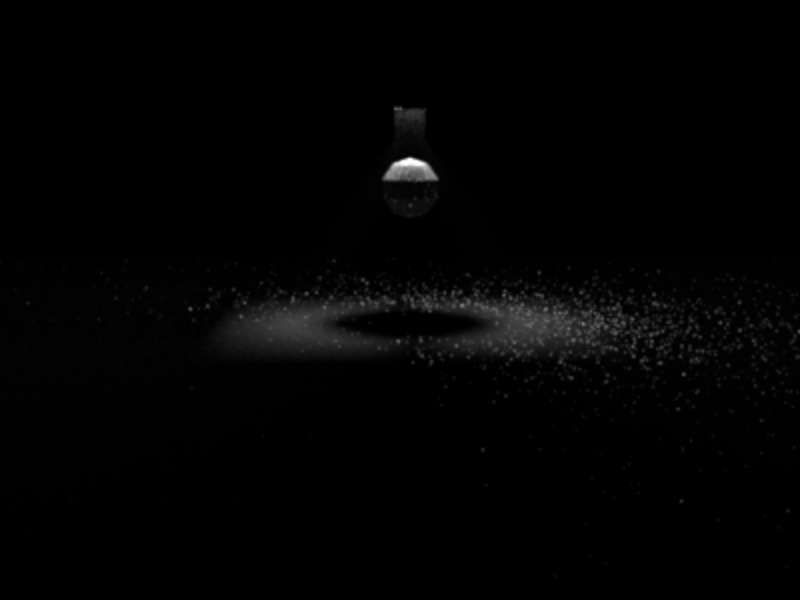
On decreasing sigma_s to 0.001 we see that the "god rays" are less visibible, as the scattering capability of the medium has decreased.
Homogenous Participating Media (25 pts)
=========
Finally, I have also implemented Homogeneous Participating Media to simulate thin fog which is spread throughout the scene. I hoped this would convey a foggy night aesthetic to my scene. As for the volumetric integrator,
I closely followed PBRv3's implemetation of VolPathIntegrator, the code is present in src/volintegrator.cpp. For the phase function, I implemented Henyey-Greenstein phase function as mentioned in PBR.
The classes handling the medium, and medium interface are implemented in include/nori/medium.h and src/homogenous.cpp. The medium is parametrized with the absorption (sigma_a) and scattering factor (sigma_s) respectively. It is also parametrized by the asymmetry factor g, which is passed to the Henyey-Greenstein phase function.
My current implementation only handles a thin fog present in the entire scene. But I feel have implemented all the necessary components to extend it multiple media easily.
To validate my implementation I have set up a simple scene containing a low-poly sphere, and a light source on top of it.
For the base case, sigma_a = sigma_s = 0.01 and g = 0 (isotropic medium). All the images are rendered at 400x300.
On decreasing sigma_s to 0.001 we see that the "god rays" are less visibible, as the scattering capability of the medium has decreased.